路由器
單頁面應用程式 (SPA) 中的路由器負責處理根據 URL 顯示不同頁面。路由器不會使用預設行為,而是會在按下連結時在本地端設定 URL,指向應用程式的有效路由;接著,路由器會偵測此變更,再決定要顯示什麼內容。
Yew 在 yew-router 箱子中提供路由器支援。要開始使用它,請將其相依模組新增到你的 Cargo.toml 中:
yew-router = { git = "https://github.com/yewstack/yew.git" }
需要的公用程式會在 yew_router::prelude 底下提供。
用法
開始時,你需要定義一個 Route。
路由可以定義為一個導出 Routable 的 enum。此列舉必須為 Clone + PartialEq。
use yew_router::prelude::*;

#[derive(Clone, Routable, PartialEq)]
enum Route {
    #[at("/")]
    Home,
    #[at("/secure")]
    Secure,
    #[not_found]
    #[at("/404")]
    NotFound,
}
一個 Route 跟一個 <Switch /> 元件成對,後者會找到路徑符合瀏覽器目前 URL 的變體,並將其傳遞給 render 回呼函式。之後回呼函式決定要呈現什麼。在找不到任何路徑配對時,路由器會導向具有 not_found 屬性的路徑。如果沒有指定任何路徑,什麼都不會被呈現,且會在主控台記載一則訊息,表示沒有路徑相符。
yew-router 的大多數元件,特別是 <Link /> 和 <Switch /> 一定要有其中一個路由元件 (例如 <BrowserRouter />) 的 (孫)子女。你的應用程式通常只需要一個路由器,最常會直接由你的最頂層 <App /> 元件呈現。路由器會註冊一個內容,這是鏈結和開關能夠運作所需要的。範例如下所示。
如果在瀏覽器環境中使用 yew-router,強烈建議使用 <BrowserRouter />。你可以在 API 參考 中找到其他路由器樣式。
use yew_router::prelude::*;
use yew::prelude::*;

#[derive(Clone, Routable, PartialEq)]
enum Route {
    #[at("/")]
    Home,
    #[at("/secure")]
    Secure,
    #[not_found]
    #[at("/404")]
    NotFound,
}

#[function_component(Secure)]
fn secure() -> Html {
    let navigator = use_navigator().unwrap();

    let onclick = Callback::from(move |_| navigator.push(&Route::Home));
    html! {
        <div>
            <h1>{ "Secure" }</h1>
            <button {onclick}>{ "Go Home" }</button>
        </div>
    }
}

fn switch(routes: Route) -> Html {
    match routes {
        Route::Home => html! { <h1>{ "Home" }</h1> },
        Route::Secure => html! {
            <Secure />
        },
        Route::NotFound => html! { <h1>{ "404" }</h1> },
    }
}

#[function_component(Main)]
fn app() -> Html {
    html! {
        <BrowserRouter>
            <Switch<Route> render={switch} /> // <- must be child of <BrowserRouter>
        </BrowserRouter>
    }
}
路徑區段
也可以使用動態和具名稱的萬用卡區段,從路徑中萃取資訊。之後你就能在 <Switch /> 內部存取這篇文章的 id,並透過屬性將其轉送給適當的元件。
use yew::prelude::*;
use yew_router::prelude::*;

#[derive(Clone, Routable, PartialEq)]
enum Route {
    #[at("/")]
    Home,
    #[at("/post/:id")]
    Post { id: String },
    #[at("/*path")]
    Misc { path: String },
}

fn switch(route: Route) -> Html {
    match route {
        Route::Home => html! { <h1>{ "Home" }</h1> },
        Route::Post { id } => html! {<p>{format!("You are looking at Post {}", id)}</p>},
        Route::Misc { path } => html! {<p>{format!("Matched some other path: {}", path)}</p>},
    }
}
你也可以用常規的 Post 變體,而非 Post {id: String}。例如,當 Post 使用其他路由器呈現時,由於其他路由器可以配對並處理路徑,欄位可能會變得多餘。有關詳細資訊,請參閱下方的 巢狀路由器 部分。
請注意,欄位必須實作 Clone + PartialEq,才能成為 Route 列舉的一部分。它們也必須實作 std::fmt::Display 和 std::str::FromStr 才能進行序列化和取消序列化。整數、浮點數和字串等原始資料類型已經符合這些需求。
如果路徑形式相符,但反序列化失敗(就像 FromStr),路由器將會將該路由視為不匹配,並嘗試呈現未找到路由(或者未指定未找到路由時呈現空白頁面)。
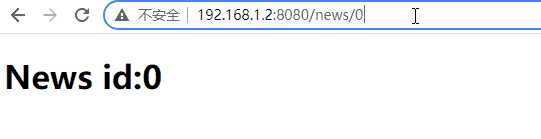
想想這個範例
#[derive(Clone, Routable, PartialEq)]
enum Route {
    #[at("/news/:id")]
    News { id: u8 },
    #[not_found]
    #[at("/404")]
    NotFound,
}
// switch function renders News and id as is. Omitted here.
當區段超過 255 時,u8::from_str() 失敗,傳回了 ParseIntError,然後路由器就會將該路由視為不匹配。
如需進一步了解路由語法和如何連結參數,請查看 route-recognizer。
位置
路由器的 Location 結構透過上下文提供通用性,可透過它存取路由資訊。可以使用 ctx.link() 上的掛勾或簡易函式來擷取它們。
導航
yew_router 提供多種工具來處理導航。
連結
<Link /> 呈現成 <a> 元素,onclick 事件處理常式就會呼叫 preventDefault,並將目標頁面推進至歷程記錄中並呈現想要的頁面,這正是單頁面應用程式的預期結果。一般錨定元素的預設 onclick 會重新載入頁面。
<Link /> 元件也會將其子元素傳遞給 <a> 元素。將它視為應用程式內路由的 <a/> 替換。但這個元件需要提供 to 屬性來取代 href。以下是範例用法:
<Link<Route> to={Route::Home}>{ "click here to go home" }</Link<Route>>
結構變異體也照預期運作
<Link<Route> to={Route::Post { id: "new-yew-release".to_string() }}>{ "Yew v0.19 out now!" }</Link<Route>>
導航器 API
函式元件和結構元件都提供導航器 API。它們讓回呼得以變更路由。這兩種情況下都可以取得 Navigator 實例來操作路由。
函式元件
對於函式元件,use_navigator 掛勾會在底層導航器提供工具變更時重新呈現元件。這裡說明如何實作在點擊時導航到 Home 路由的按鈕。
#[function_component(MyComponent)]
pub fn my_component() -> Html {
    let navigator = use_navigator().unwrap();
    let onclick = Callback::from(move |_| navigator.push(&Route::Home));

    html! {
        <>
            <button {onclick}>{"Click to go home"}</button>
        </>
    }
}
這裡的範例使用 Callback::from。如果目標路由可以與元件所在的路由相同,或僅是為了安全起見,請使用一般的回呼。舉例來說,設想每個頁面都有個標誌按鈕,點擊時會返回首頁。如果在首頁上點擊該按鈕兩次,程式碼就會發生異常,因為第二次點擊會推進相等的 Home 路由,而 use_navigator 掛勾並不會觸發重新呈現。
如果您想取代目前的網址位置而不是將一個新的網址位置傳入堆疊中,請使用 navigator.replace() 取代 navigator.push()。
您可能會注意到 navigator 必須移至回呼函式中,因此無法再次用於其他回呼函式。很幸運地,navigator 實作了 Clone,以下是一個範例,說明如何為不同的路由設定多個按鈕
use yew::prelude::*;
use yew_router::prelude::*;

#[function_component(NavItems)]
pub fn nav_items() -> Html {
    let navigator = use_navigator().unwrap();

    let go_home_button = {
        let navigator = navigator.clone();
        let onclick = Callback::from(move |_| navigator.push(&Route::Home));
        html! {
            <button {onclick}>{"click to go home"}</button>
        }
    };

    let go_to_first_post_button = {
        let navigator = navigator.clone();
        let onclick = Callback::from(move |_| navigator.push(&Route::Post { id: "first-post".to_string() }));
        html! {
            <button {onclick}>{"click to go the first post"}</button>
        }
    };

    let go_to_secure_button = {
        let onclick = Callback::from(move |_| navigator.push(&Route::Secure));
        html! {
            <button {onclick}>{"click to go to secure"}</button>
        }
    };

    html! {
        <>
            {go_home_button}
            {go_to_first_post_button}
            {go_to_secure_button}
        </>
    }
}
結構組件
對於結構組件,可以在使用 ctx.link().navigator() API 來取得 Navigator 實例。其餘部分與函式組件案例相同。以下是一個用於呈現一個單一按鈕的檢視函式範例。
fn view(&self, ctx: &Context<Self>) -> Html {
    let navigator = ctx.link().navigator().unwrap();
    let onclick = Callback::from(move |_| navigator.push(&MainRoute::Home));
    html!{
        <button {onclick}>{"Go Home"}</button>
    }
}
重新導向
yew-router 也在前奏中提供了一個 <Redirect /> 組件。它可被用於達成與 navigator API 相似的效果。這個組件接受一個 to 屬性,做為目標路由。當 <Redirect/> 被呈現時,使用者將會被重新導向至道具中指定的路由。以下是一個範例
#[function_component(SomePage)]
fn some_page() -> Html {
    // made-up hook `use_user`
    let user = match use_user() {
        Some(user) => user,
        // Redirects to the login page when user is `None`.
        None => return html! {
            <Redirect<Route> to={Route::Login}/>
        },
    };
    // ... actual page content.
}
重新導向 相對於 Navigator,該使用哪一個Navigator API 只是在回呼函式中用於控制路由的路徑。而 <Redirect /> 可用在組件中作為回傳值。您可能也會想要在其他非組件的情境中使用 <Redirect />,例如在 巢狀路由 的 switch 函式中。
監聽變更
函式組件
您可以使用 use_location 和 use_route 這些鉤子。當提供的數值發生變更時,您的組件將重新呈現。
結構組件
為了在路由變更時即時反應,您可以將一個回呼函式封包傳遞給 ctx.link() 中的 add_location_listener() 方法。
位置監聽器將在中斷後解除註冊。請務必將控制代碼儲存在您的組件狀態內。
fn create(ctx: &Context<Self>) -> Self {
    let listener = ctx.link()
        .add_location_listener(ctx.link().callback(
            // handle event
        ))
        .unwrap();
    MyComponent {
        _listener: listener
    }
}
ctx.link().location() 和 ctx.link().route::<R>() 也可一次性用來擷取地點和路由。
查詢參數
在導航時指定查詢參數
如要在導航至新路由時指定查詢參數,請使用 navigator.push_with_query 或 navigator.replace_with_query 函式。它使用 serde 將參數序列化為 URL 的查詢字串,因此可以傳遞任何實作 Serialize 的類型。最簡單的形式就是含有 string 成對值的 HashMap。
取得當前路由的查詢參數
location.query 用於取得查詢參數。它使用 serde 從 URL 中的查詢字串取消序列化參數。
巢狀路由
當應用程式變大時,巢狀路由可能很實用。考慮下列路由結構


巢狀 SettingsRouter 處理所有以 /settings 開頭的 URL。此外,它將不吻合的 URL 重新導向至主 NotFound 路由。所以 /settings/gibberish 將重新導向至 /404。
但請注意,這仍是進行中的進程,因此我們這樣做的方法並非最終版
可以用下列程式碼實作
use yew::prelude::*;
use yew_router::prelude::*;
use gloo::utils::window;
use wasm_bindgen::UnwrapThrowExt;

#[derive(Clone, Routable, PartialEq)]
enum MainRoute {
    #[at("/")]
    Home,
    #[at("/news")]
    News,
    #[at("/contact")]
    Contact,
    #[at("/settings")]
    SettingsRoot,
    #[at("/settings/*")]
    Settings,
    #[not_found]
    #[at("/404")]
    NotFound,
}

#[derive(Clone, Routable, PartialEq)]
enum SettingsRoute {
    #[at("/settings")]
    Profile,
    #[at("/settings/friends")]
    Friends,
    #[at("/settings/theme")]
    Theme,
    #[not_found]
    #[at("/settings/404")]
    NotFound,
}

fn switch_main(route: MainRoute) -> Html {
    match route {
        MainRoute::Home => html! {<h1>{"Home"}</h1>},
        MainRoute::News => html! {<h1>{"News"}</h1>},
        MainRoute::Contact => html! {<h1>{"Contact"}</h1>},
        MainRoute::SettingsRoot | MainRoute::Settings => html! { <Switch<SettingsRoute> render={switch_settings} /> },
        MainRoute::NotFound => html! {<h1>{"Not Found"}</h1>},
    }
}

fn switch_settings(route: SettingsRoute) -> Html {
    match route {
        SettingsRoute::Profile => html! {<h1>{"Profile"}</h1>},
        SettingsRoute::Friends => html! {<h1>{"Friends"}</h1>},
        SettingsRoute::Theme => html! {<h1>{"Theme"}</h1>},
        SettingsRoute::NotFound => html! {<Redirect<MainRoute> to={MainRoute::NotFound}/>}
    }
}

#[function_component(App)]
pub fn app() -> Html {
    html! {
        <BrowserRouter>
            <Switch<MainRoute> render={switch_main} />
        </BrowserRouter>
    }
}
基礎名稱
可以使用 yew-router 定義基礎名稱。基礎名稱是所有路由的公用字首。Navigator API 和 <Switch /> 元件都會採用基礎名稱設定。所有的推播路由都會加上基礎名稱前綴,而所有切換都會在嘗試將路徑解析為 Routable 之前移除基礎名稱。
如果 Router 元件沒有提供基礎名稱屬性,它會使用 HTML 檔案中 <base /> 元素的 href 屬性,假如 HTML 檔案中沒有 <base /> 則會退而使用 /。